SciELO Publishing Framework
- HOW TO INSTALL MINIO ON ROCKY LINUX 8
- HOW TO INSTALL ROCKY LINUX 8
- HOW TO INSTALL MONGODB ON ROCKY LINUX
- HOW TO INSTALL POSTGRESQL ON ROCKY LINUX
- HOW TO INSTALL SCIELO OPAC ON ROCKY LINUX
HOW TO INSTALL MINIO ON ROCKY LINUX 8
Prerequisites
- An Rocky Linux system.
- A user with root or sudo privileges. This user will be used for installing new packages and make changes system-wide.
Downloading MinIO on Rocky Linux
Use the following command to download a standalone MinIO server on Linux hosts running 64-bit Intel/AMD architectures. Replace /data with the path to the drive or directory in which you want MinIO to store data.
dnf -y install wget
wget https://dl.min.io/server/minio/release/linux-amd64/minio
chmod +x minio
mkdir /data
mv minio /usr/local/bin
Create default configuration
- This file serves as input to MinIO systemd service. Use this file to add
MINIO_VOLUMESwith the correct paths,MINIO_OPTSto add MinIO server options likecerts-dir,address. MinIO credentials can beMINIO_ROOT_USERandMINIO_ROOT_PASSWORDin this file as well. - Run the command bellow to create the file with minio parameters.
cat <<EOT >> /etc/default/minio
# Volume to be used for MinIO server.
MINIO_VOLUMES="/data"
# Use if you want to run MinIO on a custom port.
MINIO_OPTS="--address :9199"
# Root user for the server.
MINIO_ROOT_USER=spf-user
# Root secret for the server.
MINIO_ROOT_PASSWORD=spf-Password
# setting access key to access the interface web
MINIO_ACCESS_KEY="minio"
# setting secret key. Avoid using the value default from this tutorial.
MINIO_SECRET_KEY="miniostorage"

EOT
Creating minio user to run the systemd
- creating the user with no shell login and change binary and data directory ownership
useradd -r minio-user -s /sbin/nologin
chown minio-user:minio-user /usr/local/bin/minio
chown minio-user:minio-user /data
Systemd service MinIO on Rocky Linux
- Systemd script is configured to run the binary from /usr/local/bin
- Create minio.service in /etc/systemd/system/
[Unit]
Description=MinIO
Documentation=https://docs.min.io
Wants=network-online.target
After=network-online.target
AssertFileIsExecutable=/usr/local/bin/minio

[Service]
WorkingDirectory=/usr/local/

User=minio-user
Group=minio-user

EnvironmentFile=/etc/default/minio
ExecStartPre=/bin/bash -c "if [ -z \"${MINIO_VOLUMES}\" ]; then echo \"Variable MINIO_VOLUMES not set in /etc/default/minio\"; exit 1; fi"

ExecStart=/usr/local/bin/minio server $MINIO_OPTS $MINIO_VOLUMES

# Let systemd restart this service always
Restart=always

# Specifies the maximum file descriptor number that can be opened by this process
LimitNOFILE=65536

# Disable timeout logic and wait until process is stopped
TimeoutStopSec=infinity
SendSIGKILL=no

[Install]
WantedBy=multi-user.target

# Built for ${project.name}-${project.version} (${project.name})
Enable startup on boot
systemctl daemon-reload
systemctl enable minio
Starting minio
systemctl start minio
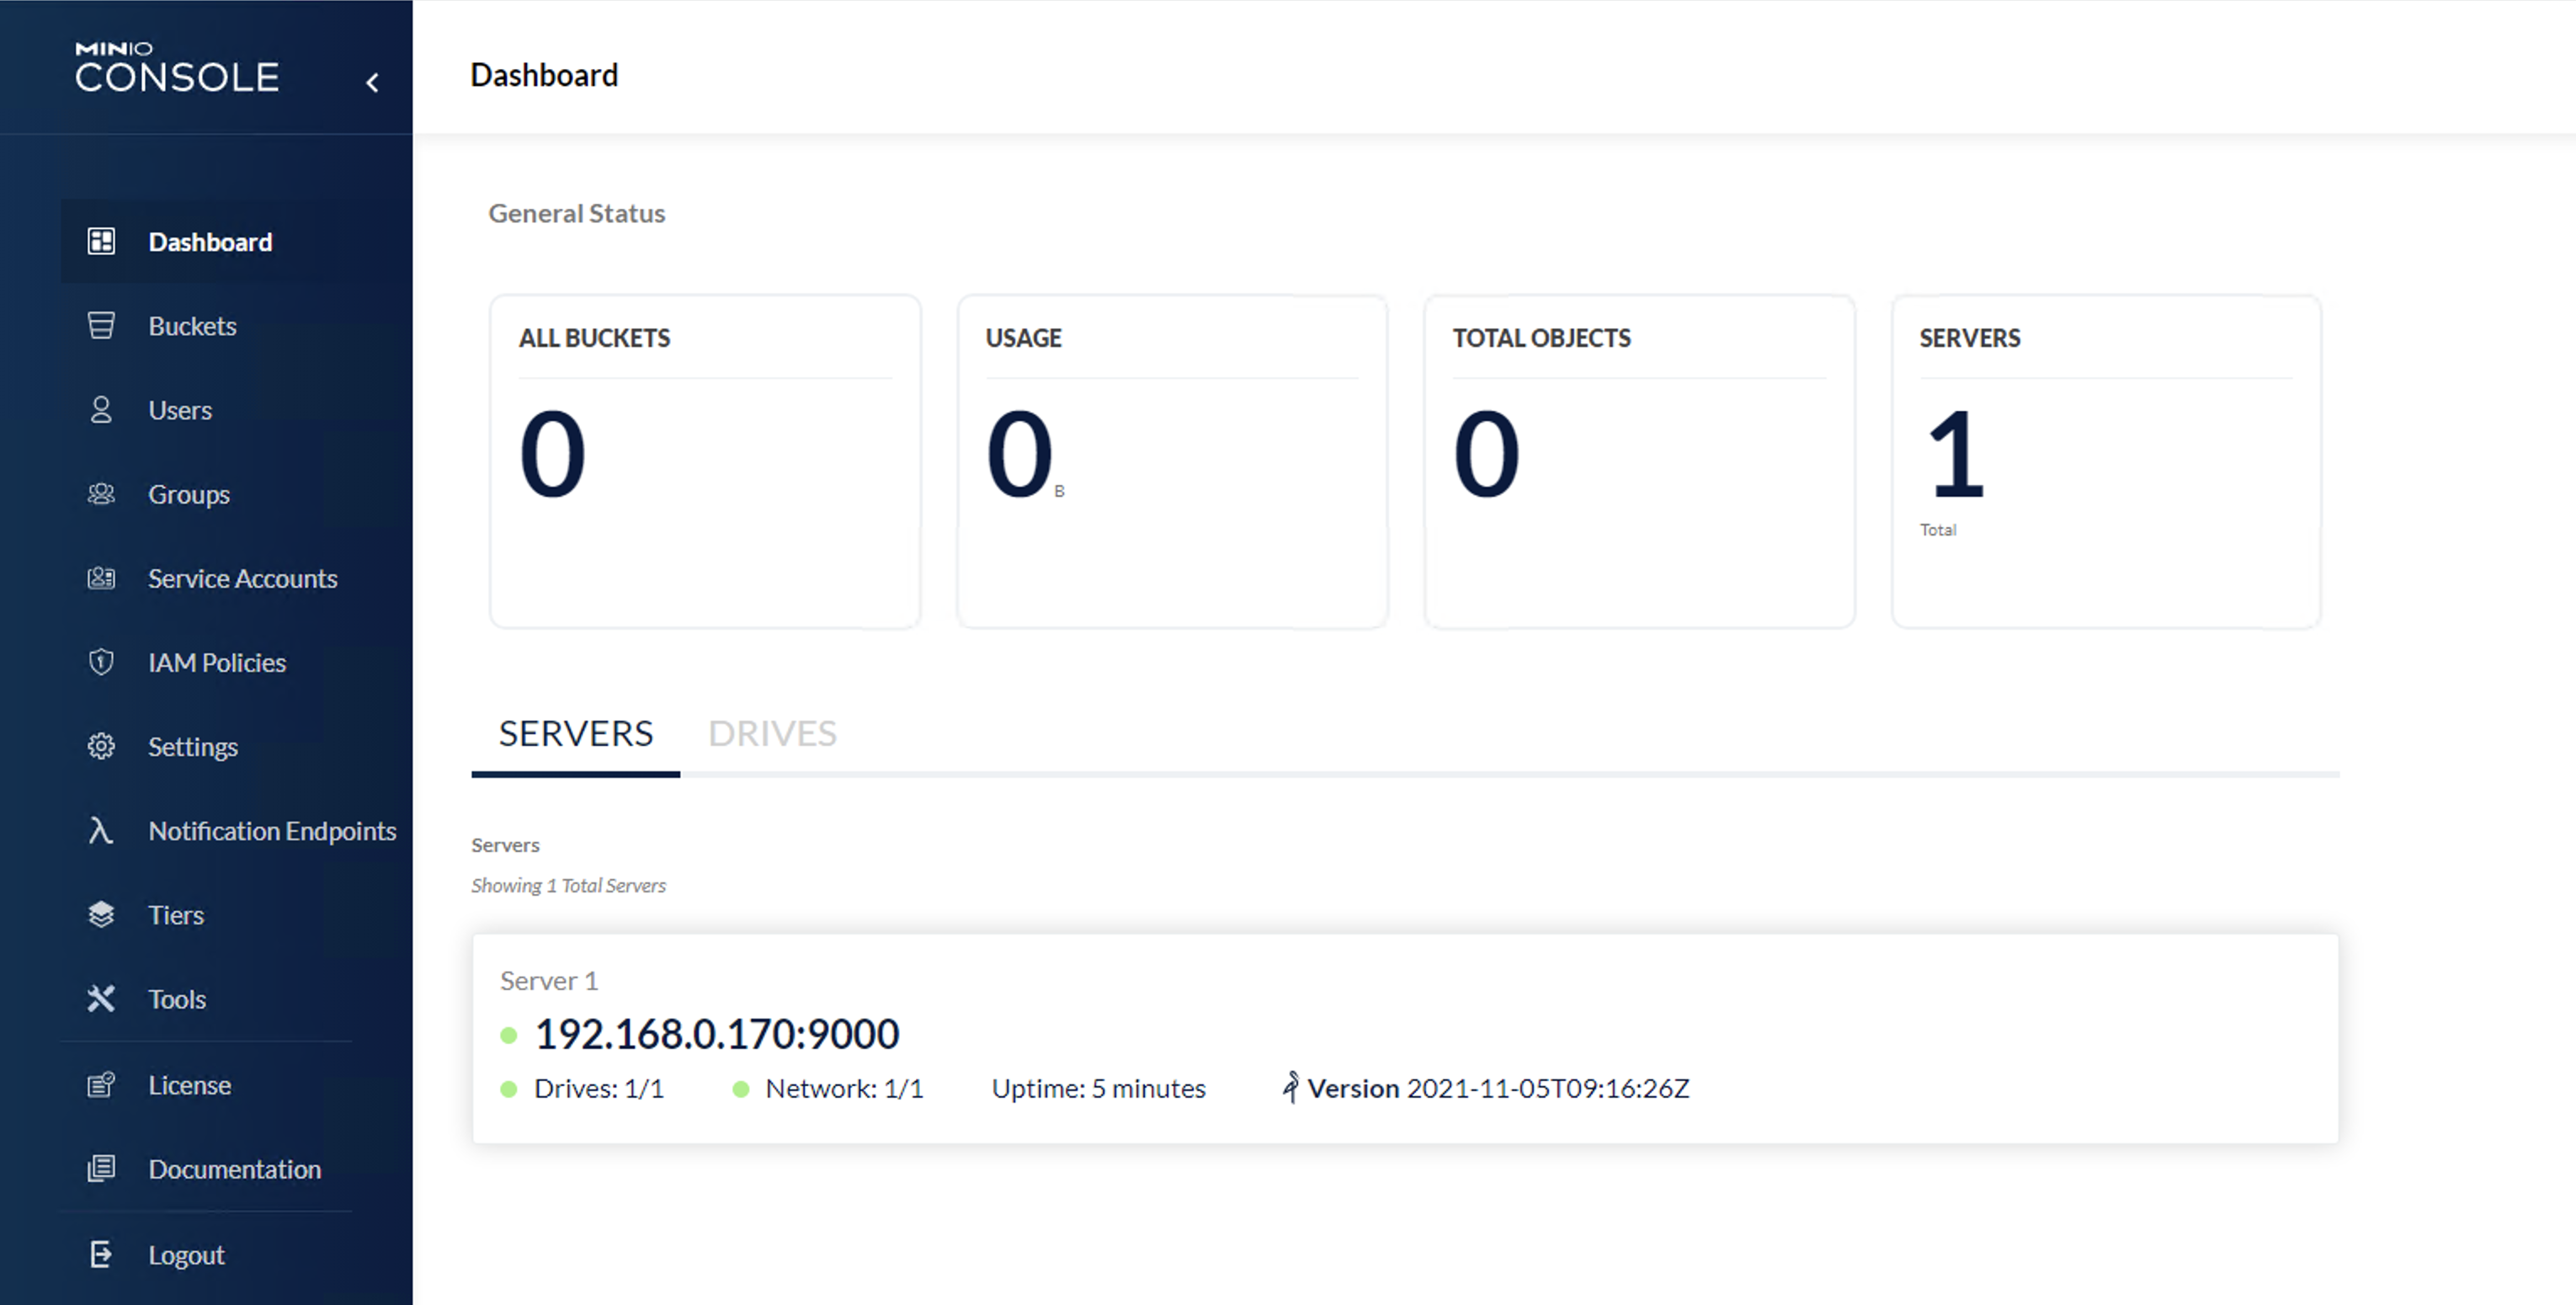
Interface Web

Reference link
https://github.com/minio/minio
HOW TO INSTALL ROCKY LINUX 8
HOW TO INSTALL MONGODB ON ROCKY LINUX
Prerequisites
- A fresh server running Rocky Linux 8 with a minimum of 10 GB of free disk space
- A non-root user with sudo privileges configured on the server
Update the System
Login to the system using root or sudo user depending on your privilege configuration, and update the system using the following command.
sudo dnf update -yInstalling MongoDB
The MongoDB package is not included in the default repositories for Rocky Linux 8 because it is not considered part of the "base" system. Thus, you need to add the repository containing the package before installing MongoDB.
MongoDB comes in two editions the community edition and the enterprise edition. The community edition is free while the enterprise edition offers additional features. This guide is for the community edition.
Run the following command to add the MongoDB Repository on your system.
cat > /etc/yum.repos.d/mongodb.repo << 'EOL'
[mongodb-org-4.4]
name=MongoDB Repository
baseurl=https://repo.mongodb.org/yum/redhat/$releasever/mongodb-org/4.4/x86_64/
gpgcheck=1
enabled=1
gpgkey=https://www.mongodb.org/static/pgp/server-4.4.asc
EOL
Once the repository is enabled, run the following command to install the mongoDB community edition.
dnf update
dnf install -y mongodb-org
Once the installation is complete, verify the version installed as follows.
mongod --version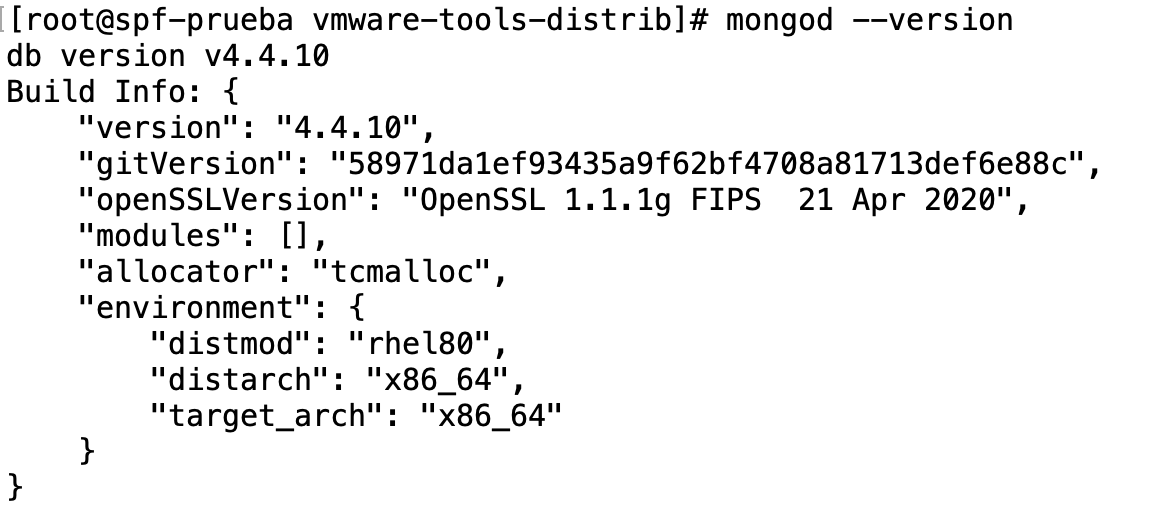
The MongoDB service doesn't start automatically after installation. You can verify this by running the command as follows.
systemctl status mongodThe output should be similar to that below:

Since the service has not started, start it manually by running the following command.
systemctl start mongodTo enable MongoDB to automatically start on boot time, run the following command.
systemctl enable mongodAt this point, MongoDB has been installed and configured on the server. Verify the status of MongoDB service as follows.
systemctl status mongod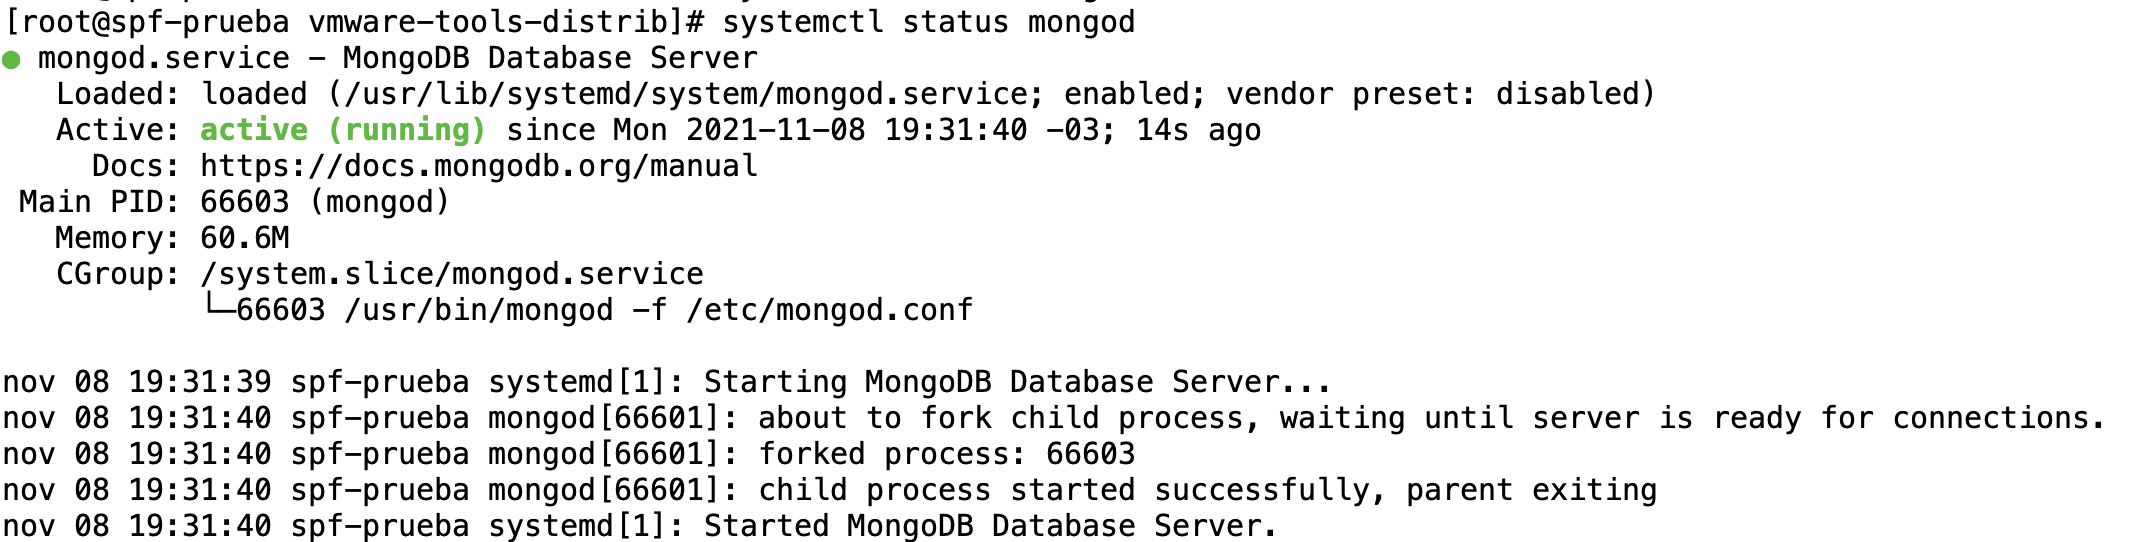
HOW TO INSTALL POSTGRESQL ON ROCKY LINUX
Prerequisites
- An Rocky Linux system.
- A user with root or sudo privileges. This user will be used for installing new packages and make changes system-wide.
Installing PostgreSQL on Rocky Linux
List out the available streams for the postgresql module using the dnf command:
dnf module list postgresqlOutput
[root@node02-postgresql ~]# dnf module list postgresql
Last metadata expiration check: 0:16:48 ago on Fri 07 Jun 2024 10:51:45 AM -03.
Rocky Linux 8 - AppStream
Name Stream Profiles Summary
postgresql 9.6 client, server [d] PostgreSQL server and client module
postgresql 10 [d] client, server [d] PostgreSQL server and client module
postgresql 12 client, server [d] PostgreSQL server and client module
postgresql 13 client, server [d] PostgreSQL server and client module
postgresql 15 client, server [d] PostgreSQL server and client module
postgresql 16 client, server [d] PostgreSQL server and client module
Hint: [d]efault, [e]nabled, [x]disabled, [i]nstalledYou can see in this output that there are four versions of PostgreSQL available from the AppStream repository: 9.6, 10, 12, and 13. The stream that provides Postgres version 10 is the default, as indicated by the [d] following it. To install that version, you could just run sudo dnf install postgresql-server and move on to the next step. However, even though version 10 is still maintained, this tutorial will install Postgres version 16.
To install PostgreSQL version 16, you must enable that version’s module stream. When you enable a module stream, you override the default stream and make all of the packages related to the enabled stream available on the system. Note that only one stream of any given module can be enabled on a system at the same time.
To enable the module stream for Postgres version 16, run the following command:
sudo dnf module enable postgresql:16When prompted, press y and then ENTER to confirm that you want to enable the stream:
Output

[root@node02-postgresql ~]# dnf module enable postgresql:16
Last metadata expiration check: 0:16:59 ago on Fri 07 Jun 2024 10:51:45 AM -03.
Dependencies resolved.
=======================================================================================================================================================
 Package                             Architecture                       Version                              Repository                           Size
=======================================================================================================================================================
Enabling module streams:
 postgresql                                                             16

Transaction Summary
=======================================================================================================================================================

Is this ok [y/N]: y
Complete!
Install the latest version of PostgreSQL from the repository using the dnf command below.
dnf install postgresql-server.x86_64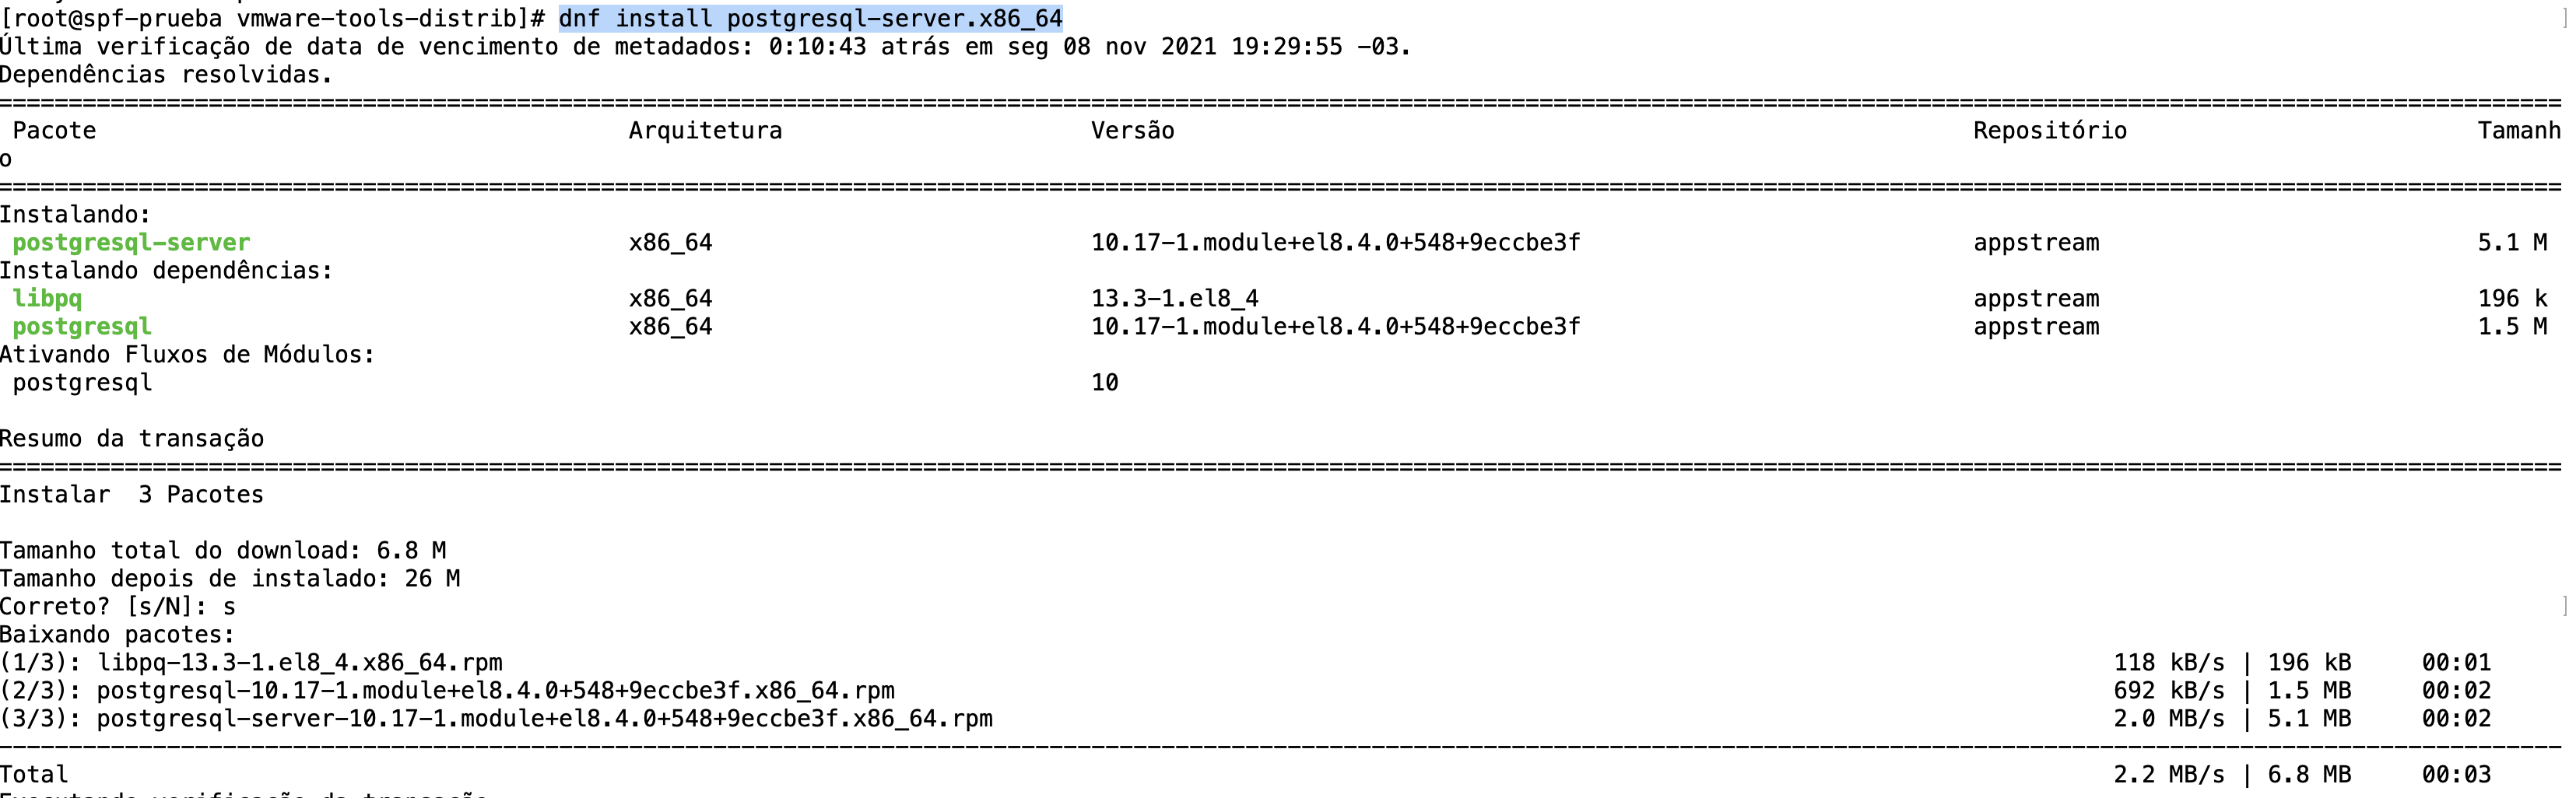
PostgreSQL Database Initialization
Next, after the PostgreSQL installation is complete, you must initialize the PostgreSQL configuration and then start and enable the PostgreSQL service.
1. Execute the following command to initialize the PostgreSQL database configuration.
postgresql-setup --initdb --unit postgresql2. After that, start and enable the PostgreSQL service using the command below.
sudo systemctl enable postgresql
sudo systemctl start postgresql
Now the PostgreSQL service is active and running, and it will run automatically on every boot.
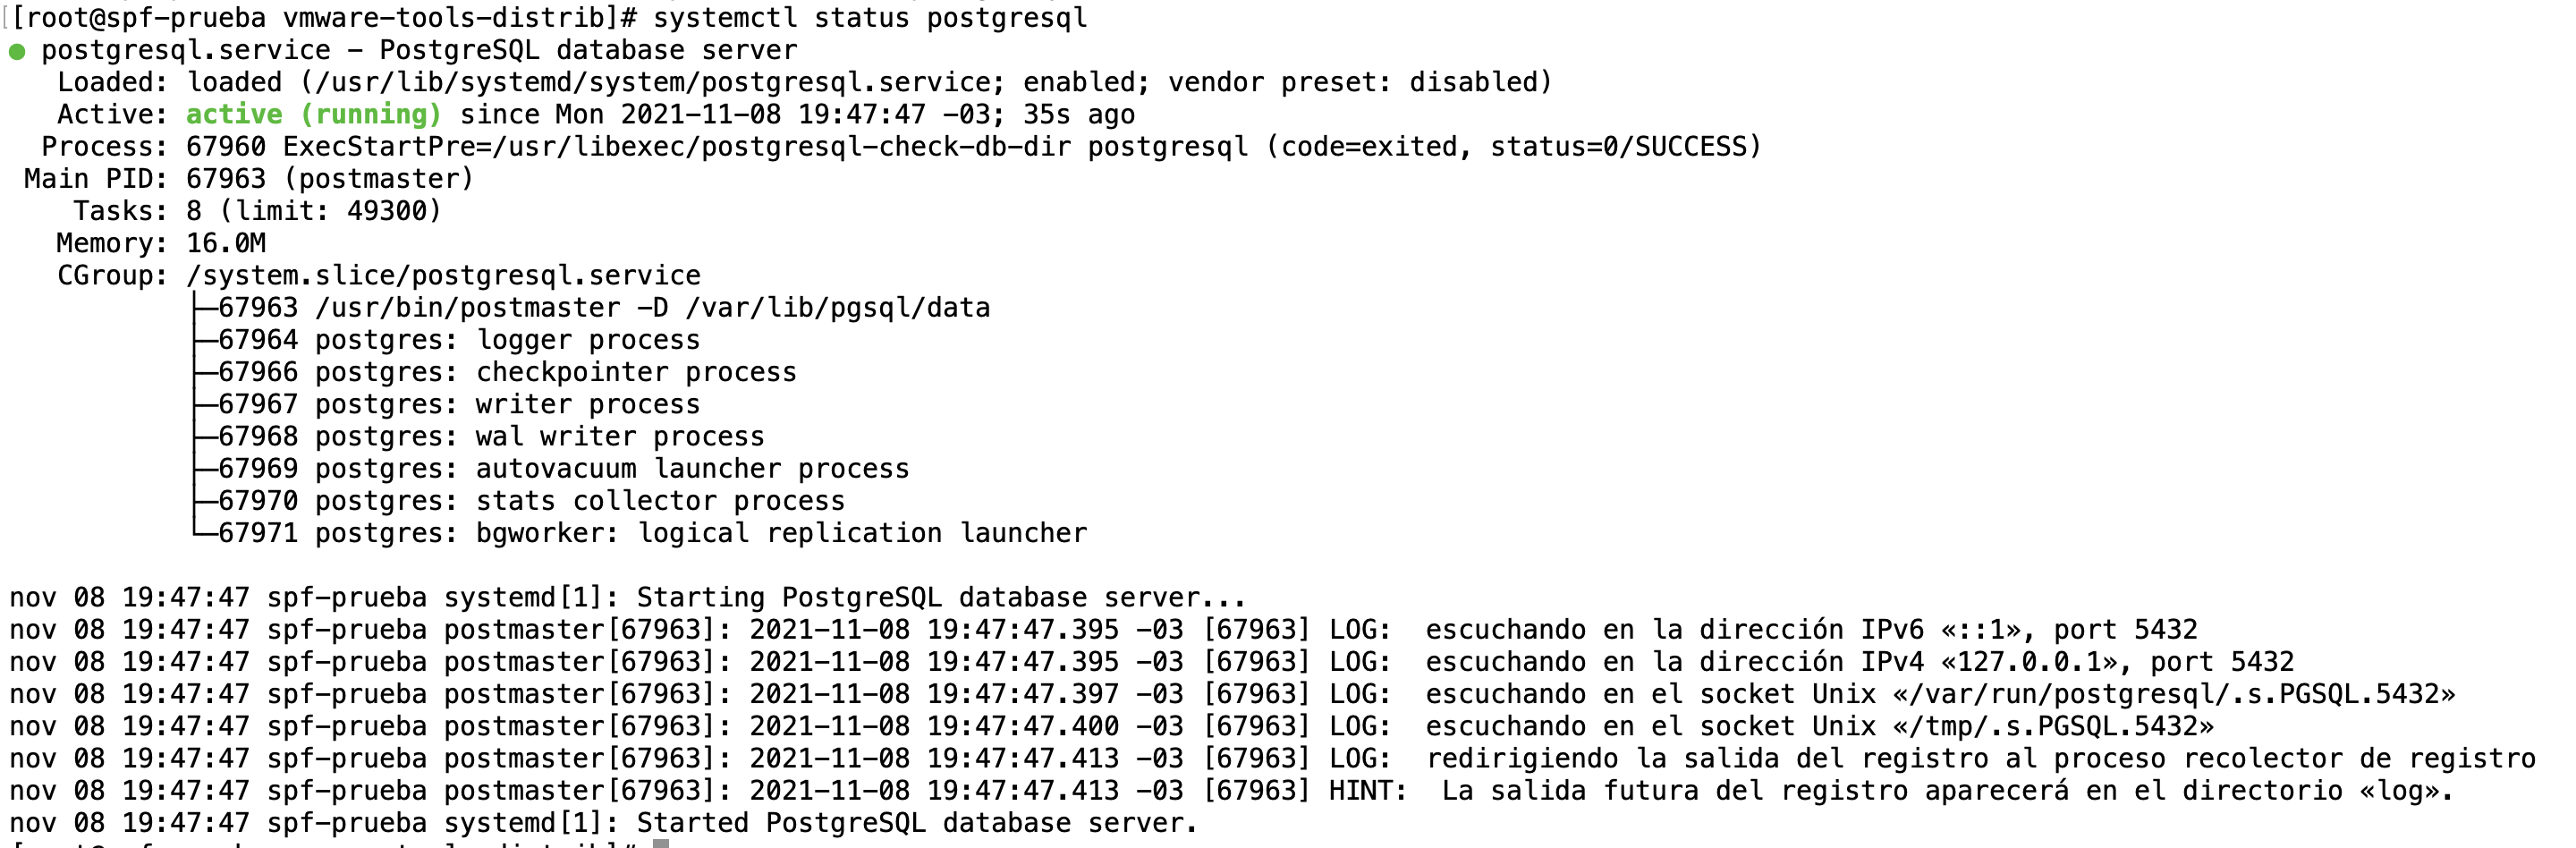
3. Now execute the command below to verify the PostgreSQL service.
systemctl status postgresqlIf your PostgreSQL service is running, you will see the green output such as "active(running)" as below. Otherwise, you will see the red output such as "failed" following by the error message logs.
Securing PostgreSQL Deployment
During the installation, PostgreSQL will create a new system user and database user name as "postgres". And for this stage, you will be setting up a new password for the "postgres" user, both for the system user and database user.
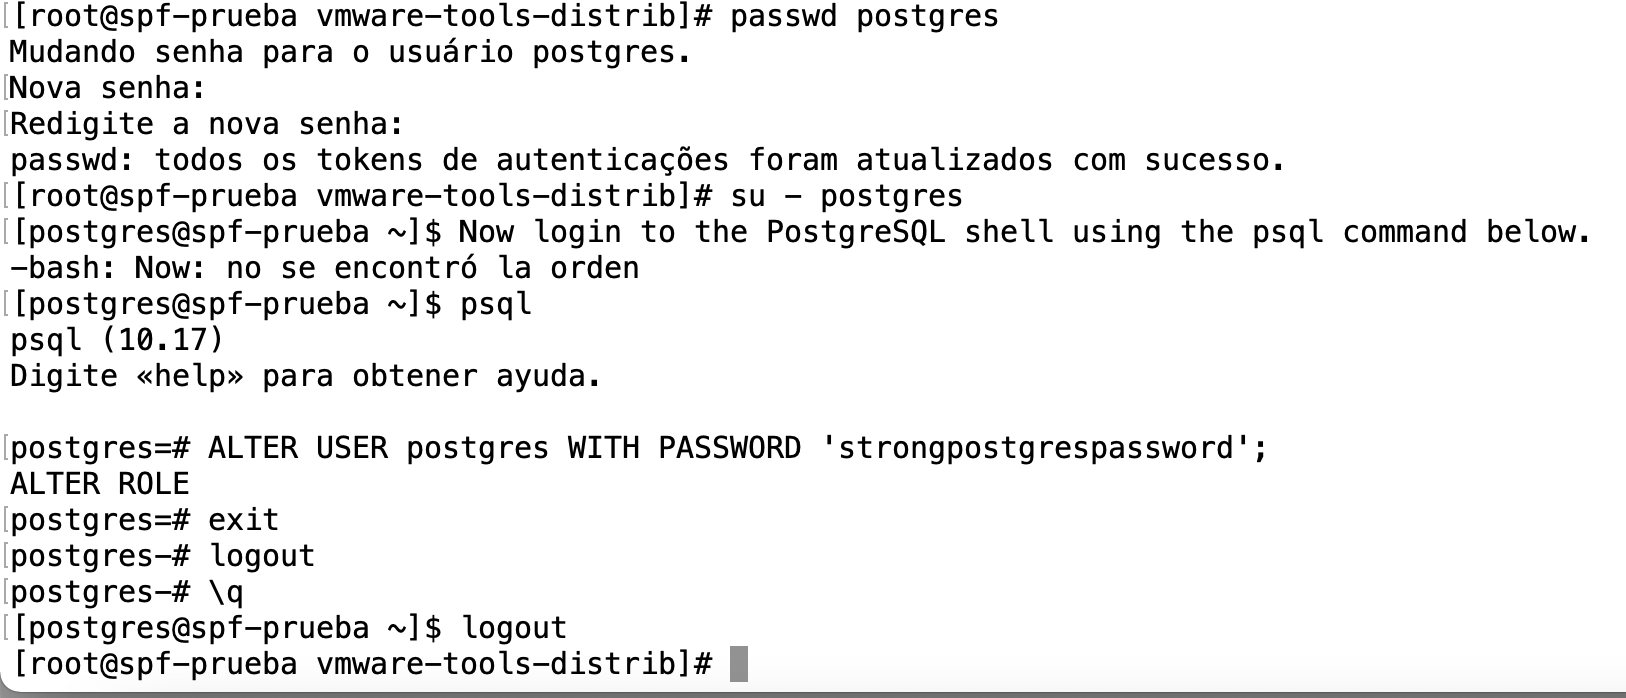
1. Change the password for default system user "postgres" using the following command.
passwd postgresNow type the new password for the system user "postgres".
2. Next, to change the password for the "postgres" database user, you must log in to the PostgreSQL shell.
First, log in as a system user "postgres" using the following command.
su - postgresNow login to the PostgreSQL shell using the psql command below.
psqlExecute the following query to create a new password for the default "postgres" database user.
ALTER USER postgres WITH PASSWORD 'strongpostgrespassword';Change the string 'strongpostgrespassword' to your own password. Now type exit and press "Ctrl+d" to exit and log out from the 'postgres' user shell.
Change Authentication Method
By default, local PostgreSQL users will connect to the PostgreSQL shell using the 'peer' method. The peer authentication method will work only for local connections. In the development environment, you can use this type of authentication, but for production, consider using the password-based authentication method.
For this stage, you will learn how to change the default peer authentication method to password authentication using 'md5'.
1. First, log in to the PostgreSQL shell using the following command.
sudo -u postgres psqlNow execute the following query to check the location of the PostgreSQL configuration 'pg_hba.conf'.
SHOW hba_file;
SHOW password_encryption;
You will see the output as below.

You will notice the PostgreSQL configuration "pg_hba.conf" are located at the '/var/lib/pgsql/data' directory, and the default password encryption for PostgreSQL on RHEL based operating system is 'md5'.
Now type '\q' to exit and quit the PostgreSQL shell.
2. Next, change the working directory to '/var/lib/pgsql/data' and edit the configuration 'pg_hba.conf' using nano editor.
cd /var/lib/pgsql/data/
vi pg_hba.conf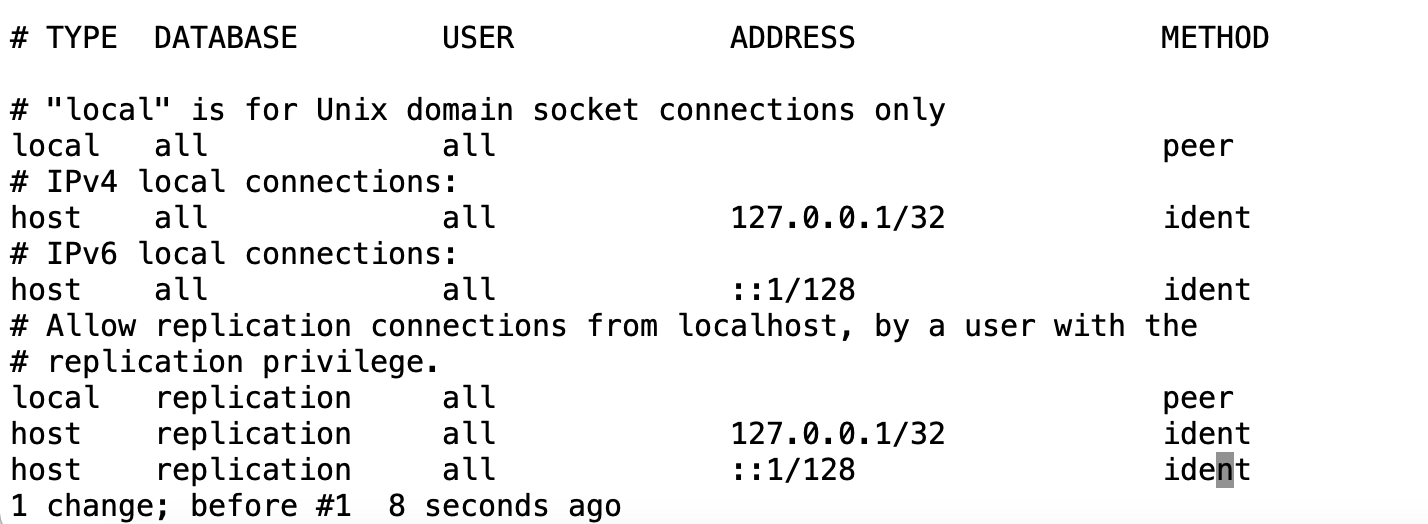
At the bottom of the line, change the local authentication method to 'md5' as below.

Now press 'ESC', type ':wq', and press "Enter" to save and exit.
Using this configuration, you will be prompted for the password to log in to the PostgreSQL shell.
3. Next, apply the new configuration by restarting the PostgreSQL service using the following command.
systemctl restart postgresqlNow every time you want to access the PostgreSQL shell, you must type the password for authentication.
4. To make sure of the password authentication configuration, log in to the PostgreSQL shell using the following command.
su - postgres
psql
Now you will be asked for a password for the default user 'postgres'.
Type the password for the 'postgres' database user and press 'Enter'. If your password is correct, you will see the PostgreSQL shell as follows. Otherwise, you will see the 'FATAL' error because the password is incorrect.

Additionally, you can use the one-line command to log in to the PostgreSQL shell as below.
# Log in as default "postgres" user
sudo -u postgres psql

# Log in as another user
sudo -u postgres psql -U username
Creating New User and Database for your Application
At this stage, you will learn how to create a new user and database on PostgreSQL.
1. Log in to the PostgreSQL shell by executing the command below.
sudo -u postgres psqlNow type the password for PostgreSQL user 'postgres'.
2. Run the PostgreSQL query below to create a new user 'johndoe' with the password 'johndoestrongpassword' and give the user privileges for creating a new database and role.
CREATE USER spf WITH
CREATEDB
CREATEROLE
PASSWORD 'spfstrongpassword';
After that, verify the new user using the following query.
\duNow you will see the new user 'spf' with the list of roles 'Create role' and 'Create DB' as below.

3. Next, to create a new user database on PostgreSQL, run the following query.
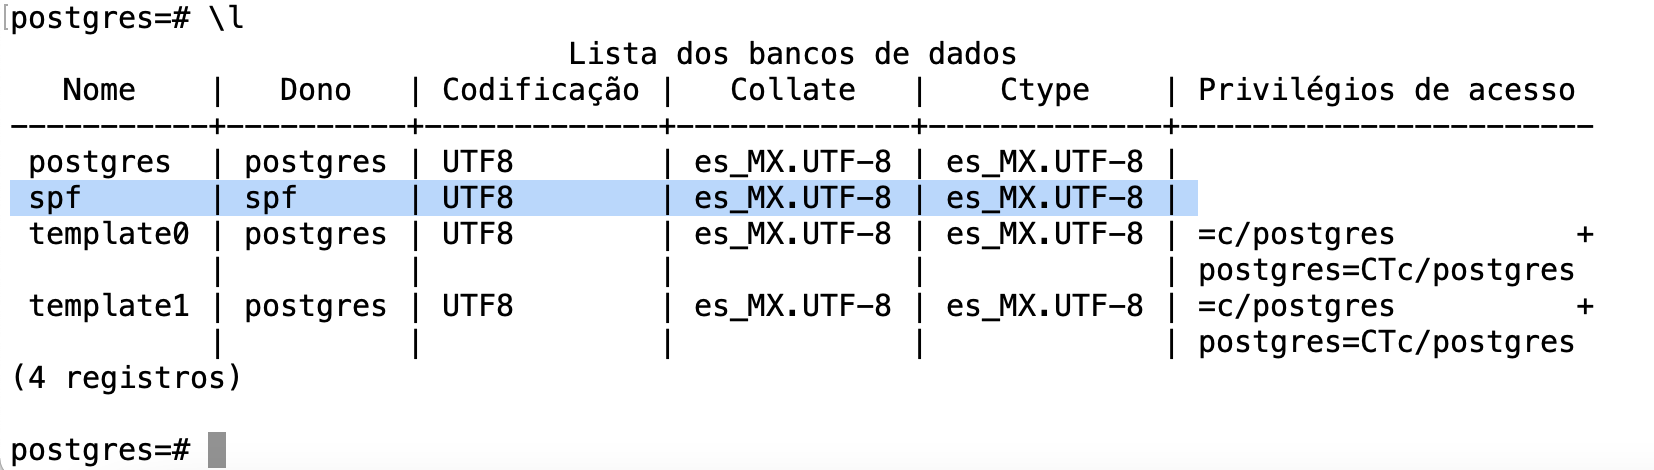
CREATE DATABASE spf OWNER spf;Now verify the new database using the following query.
\lAnd you will see the new database 'spf' with the owner 'spf' as the screenshot below.
Reference link
https://www.howtoforge.com/how-to-install-postgresql-on-rocky-linux/
https://www.digitalocean.com/community/tutorials/how-to-install-and-use-postgresql-on-rocky-linux-8
HOW TO INSTALL SCIELO OPAC ON ROCKY LINUX
Prerequisites
- An Rocky Linux system.
- A user with root or sudo privileges. This user will be used for installing new packages and make changes system-wide.
- Python 3.x (earlier version) and git command
Getting the last version
- Dowloading the newest release, uncompress and move to the directory /usr/local/opac
wget https://github.com/scieloorg/opac/archive/refs/tags/v3.4.51.tar.gz
tar -zxvf v3.4.51.tar.gz
mv opac-3.4.51 /usr/local/opac
Installing OPAC
- Create python environment and install using pip
# Installing git command
dnf install git

cd /usr/local/opac
# Creating the environment
python3 -m venv .venv

# Activating the environment
source .venv/bin/activate

# Installing
pip install -U pip & pip install -r requirements.txt
Configuring OPAC
- Copy the variable file default.py to local_settings.py
cd /usr/local/opac
cp opac/webapp/config/default.py opac/webapp/config/local_settings.py|
Variable de entorno |
Descripción |
Valor predeterminado |
|
OPAC_DEBUG_MODE |
Habilita/deshabilita el modo DEBUG |
False |
|
OPAC_CONFIG |
Archivo de configuración de la aplicación (consulte las instrucciones a continuación) |
|
|
OPAC_COLLECTION |
Acrónimo de la colección |
mex |
|
OPAC_MONGODB_NAME |
Nombre de la base de datos MongoDB |
opac |
|
OPAC_MONGODB_HOST |
Host do MongoDB |
localhost |
|
OPAC_MONGODB_PORT |
Puerto de host MongoDB |
27017 |
|
OPAC_DATABASE_DIR |
Directorio de almacenamiento base de SQLite |
/tmp |
|
OPAC_DATABASE_FILE |
Nombre de archivo SQLite |
Opac.sqlite |
|
OPAC_DATABASE_URI |
URI da base SQLite |
sqlite:////tmp/opac.sqlite |
|
OPAC_MEDIA_ROOT |
Ruta absoluta de la carpeta que almacenará las imágenes registradas por los usuarios a través de la interfaz de administración |
<ruta>/media |
|
OPAC_MEDIA_URL |
RUTA DE ACCESO DE LA URL para servir las imágenes |
/media |
|
OPAC_MAIL_SERVER |
Host del servidor de correo |
localhost |
|
OPAC_MAIL_PORT |
Puerto de host del servidor de correo |
1025 |
|
OPAC_SECRET_KEY |
Clave necesaria para la seguridad de los formularios de solicitud (consulte las instrucciones a continuación) |
|
|
OPAC_SSM_SCHEME |
Protocolo de conexión del almacén de objetos |
https |
|
OPAC_SSM_DOMAIN |
Host do Object Store |
ssm.scielo.org |
|
OPAC_SSM_PORT |
Puerto de host de almacén de objetos |
80 |
|
OPAC_SSM_XML_URL_REWRITE |
¿Cambiará el esquema de URL + autoridad registrada en el artículo? Si es true, fuerce la búsqueda del artículo en la url 'OPAC_SSM_SCHEME + '://' + OPAC_SSM_DOMAIN + ':' + OPAC_SSM_PORT'. De lo contrario, carga la dirección URL registrada en el artículo |
True |
|
OPAC_CACHE_ENABLED |
Activa/desactiva la cache con Redis |
True |
|
OPAC_CACHE_DEFAULT_TIMEOUT |
Duración de los objetos de la memoria caché en segundos |
3600 |
|
OPAC_CACHE_REDIS_HOST |
Host de Redis para cache |
cache en redis |
|
OPAC_USE_METRICS |
Activa/desactiva la integración con SciELO Analytics |
False |
|
OPAC_METRICS_URL |
URL de SciELO Analytics |
http://analytics.scielo.org |
|
OPAC_USE_DIMENSIONS |
Activa/desactiva la integración de dimensiones |
False |
|
OPAC_DIMENSIONS_METRICS_URL |
Dirección URL de dimensiones |
https://badge.dimensions.ai/details/doi |
|
OPAC_USE_PLUMX |
Activa/desactiva la integración con PlumX |
False |
|
OPAC_PLUMX_METRICS_URL |
URL de PlumX |
https://plu.mx/scielo/a |
|
OPAC_USE_ALTMETRIC |
Activa/desactiva la integración altmetric |
False |
|
OPAC_ALTMETRIC_METRICS_URL |
Dirección URL de Altmetric |
https://www.altmetric.com/details.php |
|
OPAC_AUDIT_LOG_NOTIFICATION_ENABLED |
Activa/desactiva las notificaciones de informes de auditoría |
True |
|
OPAC_AUDIT_LOG_NOTIFICATION_RECIPIENTS |
Lista de correos electrónicos que deben recibir el informe de auditoría, separados por comas (",") |
Lista vacía (ninguna) |
|
OPAC_SERVER_NAME |
Nombre del servidor/IP |
Vacío (ninguno) |
|
OPAC_SESSION_COOKIE_DOMAIN |
Dominio para cookie de sesión. Configura SESSION_COOKIE_DOMAIN |
Valor del OPAC_SERVER_NAME |
|
OPAC_SESSION_COOKIE_HTTPONLY |
Habilita o deshabilita la cookie de sesión solo en HTTP. Configura SESSION_COOKIE_NAME |
True |
|
OPAC_SESSION_COOKIE_NAME |
Nombre de la cookie de sesión. Configura SESSION_COOKIE_NAME |
opac_session |
|
OPAC_SESSION_COOKIE_PATH |
Ruta de acceso a la cookie de sesión. Configura SESSION_COOKIE_PATH |
Ninguno, que es la raíz de la aplicación ("/") |
|
OPAC_SESSION_COOKIE_SECURE |
Establece si la cookie de sesión debe marcarse como segura. Conjuntos SESSION_COOKIE_SECURE |
False |
|
OPAC_SESSION_REFRESH_EACH_REQUEST |
Envío de la cookie en cada solicitud. Conjuntos SESSION_REFRESH_EACH_REQUEST |
False |
|
OPAC_TWITTER_ACCESS_TOKEN |
Token de acceso de la cuenta de twitter |
|
|
OPAC_TWITTER_ACCESS_TOKEN_SECRET |
Secreto de token de acceso desde la cuenta de Twitter |
|
|
OPAC_TWITTER_CONSUMER_KEY |
Cuenta de Twitter de clave de consumidor |
|
|
OPAC_TWITTER_CONSUMER_SECRET |
Secreto del consumidor de la cuenta de Twitter |
|
|
OPAC_TWITTER_SCREEN_NAME |
Nombre de pantalla de la cuenta de Twitter |
Red SciELO |